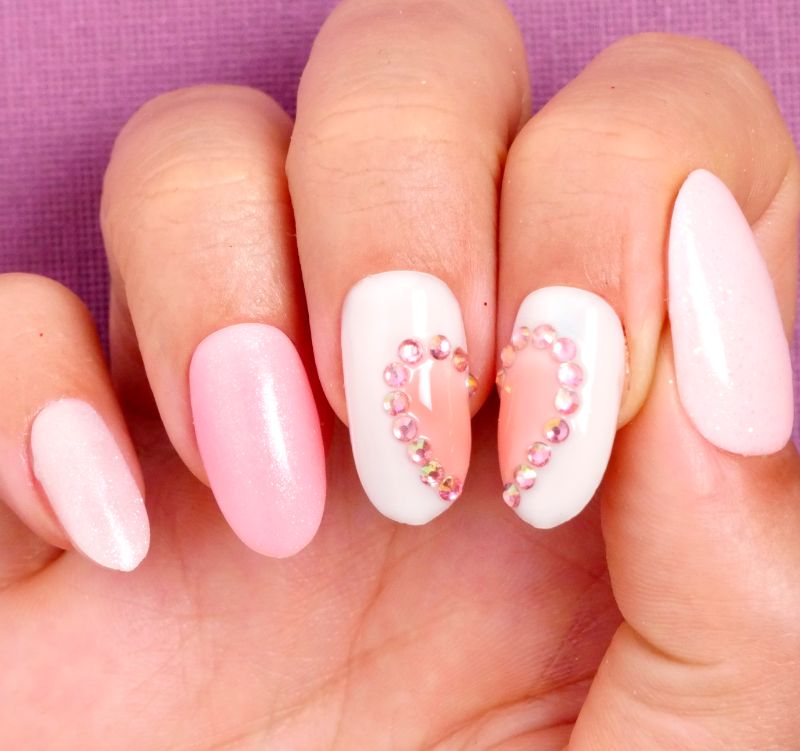
When it comes to romantic nail art, you can start to feel a little bit jaded. Going for cutesy hearts is always an option — but let's face it; it's hardly a unique or innovative nail art idea, is it?
But this tutorial offers you an editorial twist on a classic. By simply splitting your heart design between two nails, you take the whole look to the next level. So whether you're a true romantic or playing the heartbreaker, this a romantic nail art tutorial with a difference.
Advertisement
Materials
- Milky White Gel Vishine in "1346"
- Gelish Top It Off
- Milky Nude by Born Pretty in "Cranberries"
- Pink Iridescent Rhinestones by Nicole Diary
- Wax pencil
- Tweezers
- Lumcrissy lamp for curing gel
- Milky White Gel Vishine in "1346"
- Gelish Top It Off
- Milky Nude by Born Pretty in "Cranberries"
- Pink Iridescent Rhinestones by Nicole Diary
- Wax pencil
- Tweezers
- Lumcrissy lamp for curing gel

Fierce League
Instructions
1. Paint your nails with a milky-white base shade.
1. Paint your nails with a milky-white base shade.
2. Apply a clear topcoat, then allow to dry using a gel lamp.
3. Take a pale pink gel shade, and apply to the right side of your middle fingernail in a teardrop shape.
4. Allow this accent shade to dry under the gel lamp.
5. Apply clear top coat over the entire nail.
6. Using a wax pencil, apply pink rhinestones around the border of the teardrop shape while your topcoat is still wet. Press firmly into place using tweezers.
7. Dry using the gel lamp.
8. Repeat the same design in a mirror image on your index finger, so the two nails come together to form a heart shape.
Advertisement
