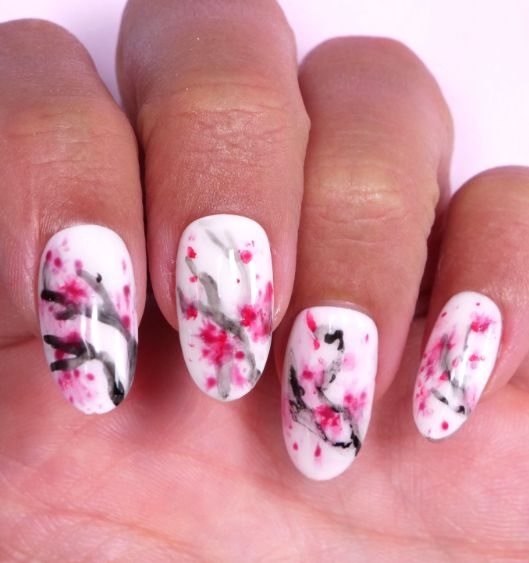
One of nature’s greatest gifts is the cherry blossom tree. Each year, these fragrant blossoms herald the arrival of spring. Their flowers range from creamy white to deep pink, and their shapes are easy to recreate for a flower-inspired manicure.
The splattered nail trend makes this design even easier to do since you don’t have to be precise. A watercolor pen brush is important to have since it creates a thicker line than a regular detail brush can make. After you draw the black branches, add some watercolor blossoms and gel paint accents to give this pretty look dimension. This is destined to be one of spring’s most popular designs.
Advertisement
Materials
- White gel nail polish
- UV or LED lamp (not shown)
- Matte no wipe gel top coat
- Watercolor brush pen with pointed tip
- Water
- Paper towels
- Watercolor palette with black and red paint
- Small bowl of water
- Fine detail brush
- Clear base nail gel
- Dotting tool
- Burgundy gel paint
- Cherry red gel paint
- Extreme Post-it notes
- Clear gel top coat
Fierce League
Instructions
1. Apply two coats of white gel polish to the nails, curing them in between coats with the UV or LED lamp.
1. Apply two coats of white gel polish to the nails, curing them in between coats with the UV or LED lamp.
2. Apply a single layer of matte no wipe gel top coat to the nails. Then cure them with the lamp.
3. Fill the watercolor brush pen with water. Then blot the tip on a paper towel to eliminate excess moisture.
4. Dip the brush pen into the black paint pan and blot it on the paper towel. Then pick up more black paint and draw wavy lines on the nails to simulate the branches.
5. Allow the paint to dry thoroughly. Then apply a layer of matte gel top coat to the nails. Then cure them with the lamp.
6. Dip the fine detail brush into the water and blot the excess on a paper towel. Then dip the brush into the red watercolor paint. Blot the excess on the paper towel, if desired. Then paint red dots and splotches onto the nails. Tip: Diffuse the paint by wetting the brush occasionally and brushing it over the red paint.
7. After the nail paint has dried, apply a single coat of clear base nail gel to the nails and cure with the lamp.
8. Dip the dotting tool into the burgundy paint. Then tap the excess onto the pad of Post-it notes. Apply tiny dots on top of the red watercolor designs. This will give them more dimension.
9. Wipe any remaining paint off the dotting tool. Then repeat step 8 using the cherry red paint.
10. Lightly drag the fine detail brush through the wet paint to spread it out. Then cure the nails with the lamp.
11. Apply one layer of clear gel top coat to the nails. Then cure them with the lamp.
Enjoy this pretty look! Share this with your friends on Facebook.
Advertisement